


A Budget Floor Makeover: How I Covered 200 Sq Ft with Peel and Stick Tiles for $300
|
|
Time to read 4 min
|
|
Time to read 4 min
My landlord's 1980s linoleum floor was an eyesore—yellowed, cracked, and straight out of a time capsule! Yet, replacing it permanently was totally off the table. But I wasn't about to lose my deposit over a floor makeover.
The only problem was that I was on a tight budget to hire an expert, and I had zero DIY experience. But on the upside, I had a determined mind and a long weekend.
And for just $300, I transformed the space with peel and stick floor tiles into a modern, Instagram-worthy floor...without violating my lease or needing a single power tool!
The best part? When my landlord did the walk-through, he found no damage, and I got my full deposit back!
So, if you are looking for cheap floor makeovers, here's how I transformed the 200 sq ft floor for just $300, without a single tool rental!
The project centered on a 200 sq ft kitchen and dining area with original linoleum flooring that had seen decades of wear. The floor was visibly cracked and faded, with uneven surfaces and discoloration that made the space feel outdated.
I had planned that the cost to tile 200 sq ft would not exceed $300, so I did not need to buy unnecessary tools.
Here’s everything I needed:
The table below shows the exact peel and stick floor tiles cost breakdown for all the materials, plus where you can purchase them.
|
Material |
Brand/Model |
Budget |
Actual Price |
Where to Buy |
Savings |
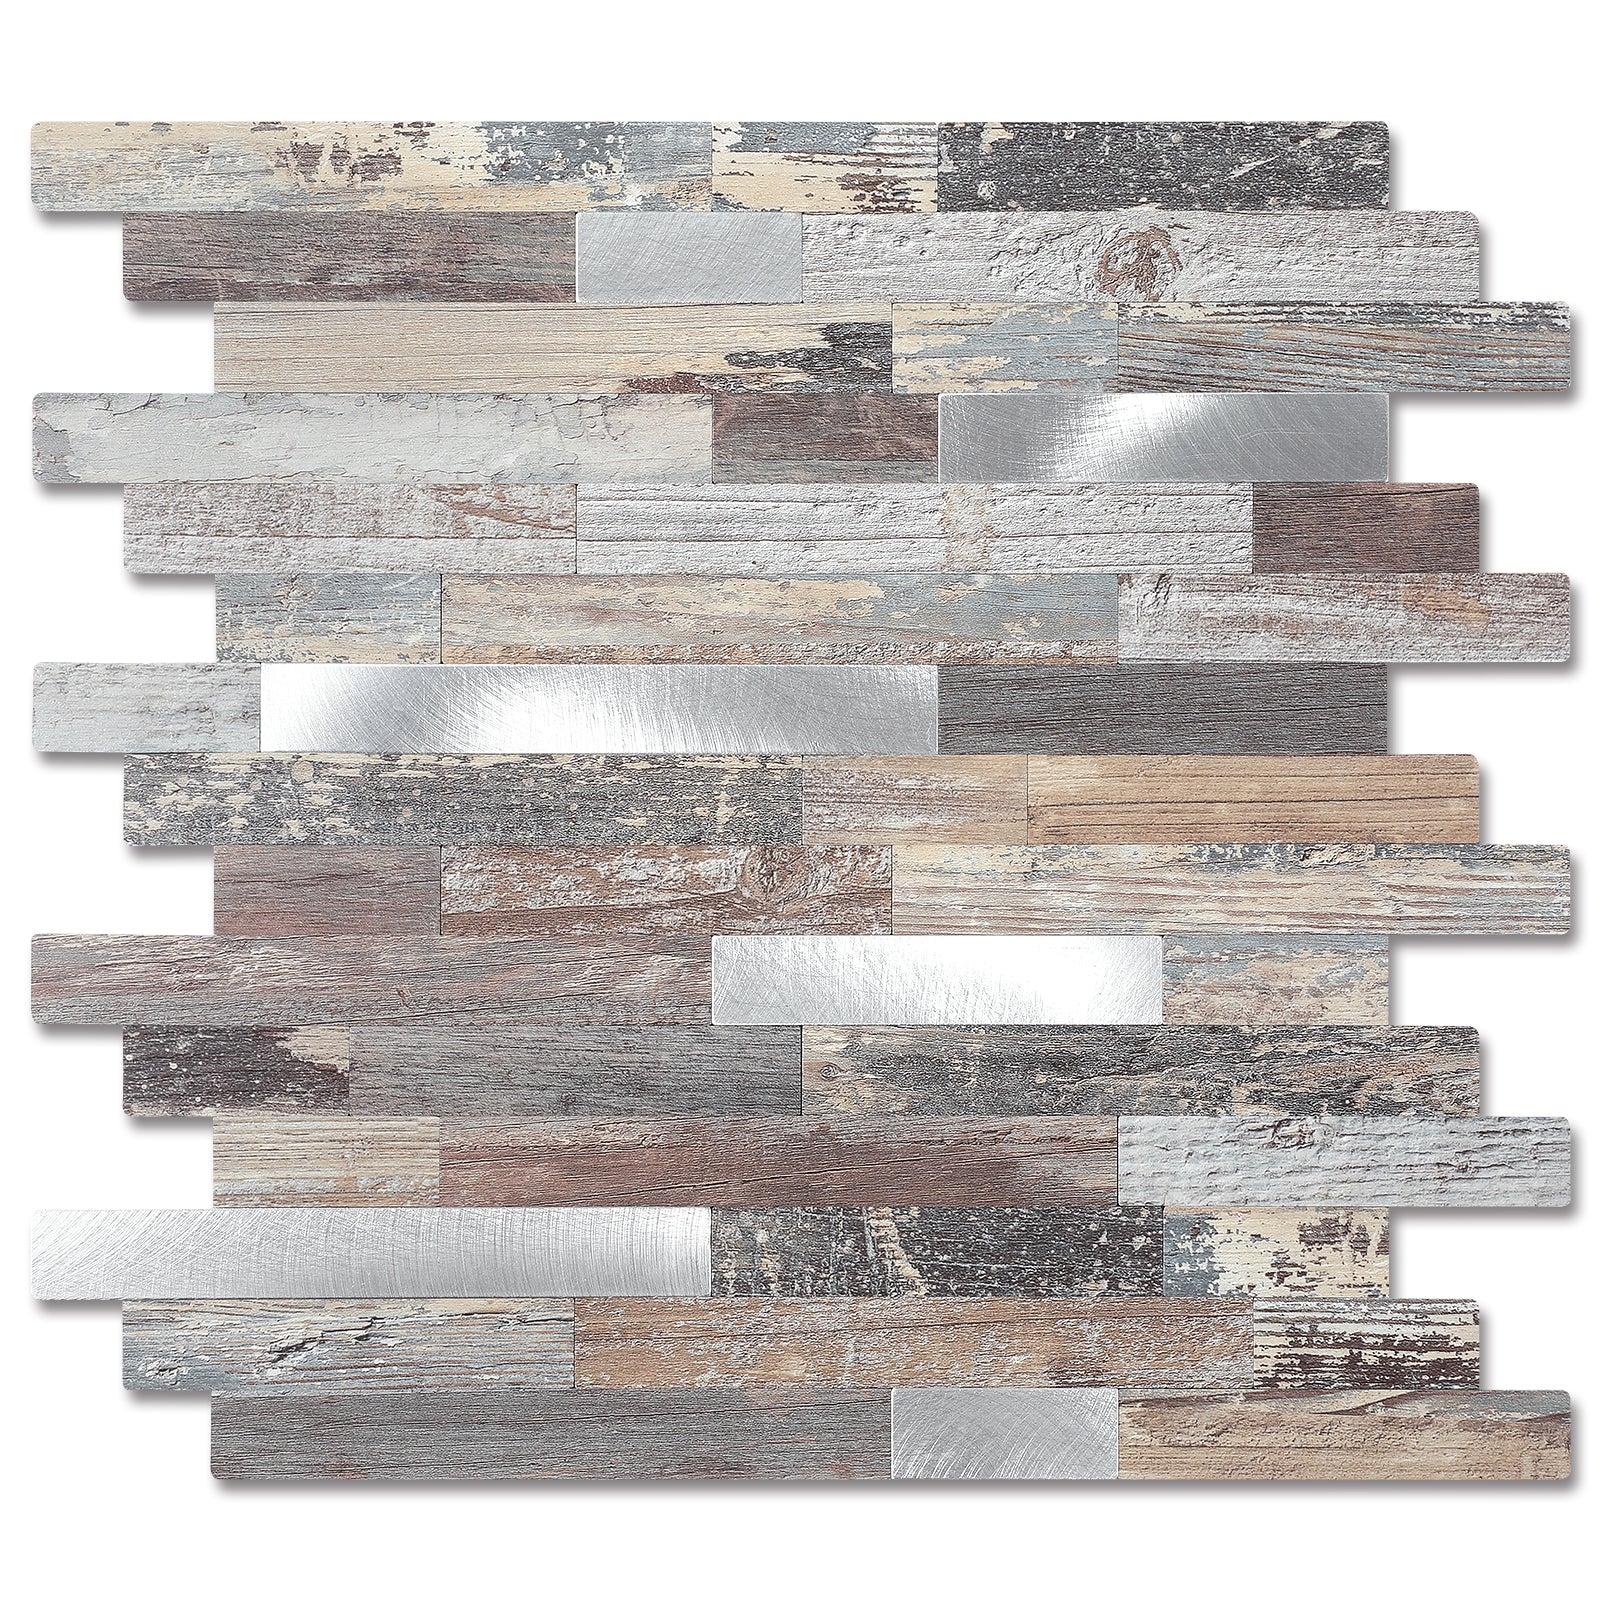
Tiles |
Yipscazo Wood Grain Tile(244sqft) |
$280 ($1.2/sq ft) |
$238(save 15%) |
yipscazotile.com |
$42 |
Underlay |
$40 |
$32-$0(Can be omitted) |
Amazon |
$8 |
|
Tool Kit |
Basic DIY Tool Kit |
$40 |
$25 |
Home Depot |
$15 |
Cleaning Supplies |
TSP cleaner + patching paste |
$30 |
$0 |
Amazon |
$30 |
Total Savings |
$95 |
||||
Peel and stick floor tiles won't adhere to dirty surfaces. So, I used TSP cleaner to scrub away decades of dirt and grime to prevent the tiles from lifting or failing over time.
If your floor isn't overly dirty you can use vinegar-water mix alongside other household cleaners, otherwise you can't skip TSP.
Wear gloves—TSP is tough on the skin!
Next, I filled cracks and uneven spots with vinyl patching(patching paste). I left it overnight to dry. If you skip this, your tiles will bubble!
I added a waterproof foam underlay for moisture protection. And although you can skip this step if you don’t have moisture problems, I wouldn’t recommend it. The underlay foam also helps protect the original floor from damage and muffle footstep noise.
Using a laser level, I marked the room’s center and began tiling outward. Marking the room’s center gave me a symmetrical pattern and helped me avoid awkward edge cuts.
Pipes and corners can get you stumped—until you trace shapes onto cardboard first. Saved me from wasting $20 on tiles!
To hide the edges, I applied silicone caulking along the edges of the tiled area to seal gaps and prevent moisture intrusion. I also installed transition strips where the tile meets to create a seamless and aesthetically pleasing transition.
Note: If you skip expansion gaps, humidity can cause slight warping at the edges, especially during summer.
Fix: A hairdryer and heavy books! Gently heated the tiles, pressed them flat, and left weights overnight. Crisis averted!
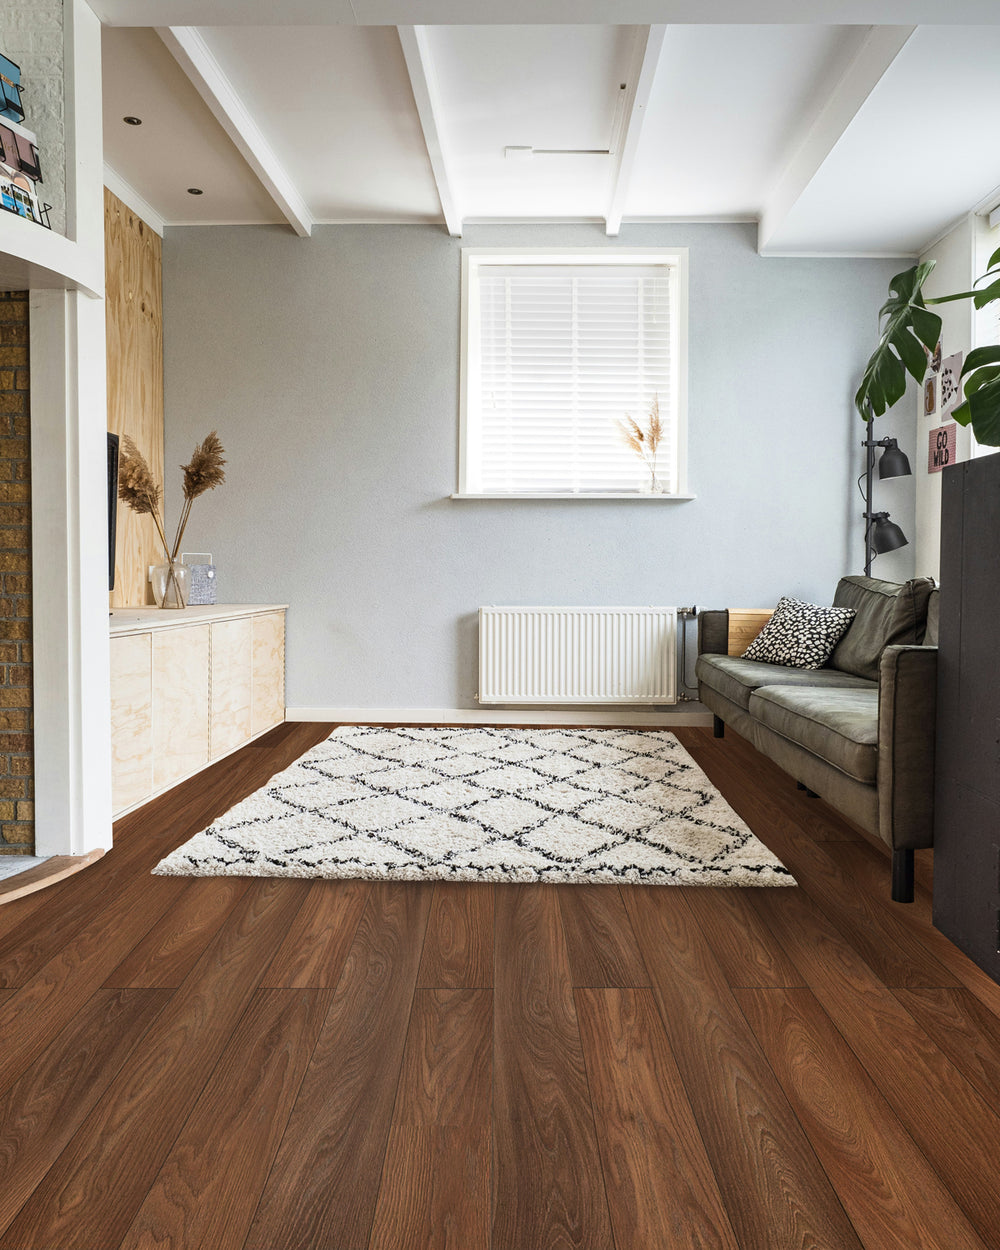
Here's the image display of before and after renovation. As you can see, the original floor was full of cracks, fading, and had a greasy feeling. But after renovation, it has a modern wood grain texture and a larger space.
Six months later, the peel and stick floor still looks like the day I installed it.
Here's my peel and stick floor tiles long-term review after 6 months:
Durability: There are slight scratches (pet claw marks), but the matte surface hides them well. You'd have to crawl on the floor to spot them!
Waterproof Test: There's no penetration in the kitchen, the base pad (waterproof foam underlay) is effective.
Maintenance: There's no special way to maintain vinyl floor tiles. Just the regular cleaning routine, but I use a special cleaning spray occasionally, which would roughly cost you $10 a year.
Yes, if your room turns into an icebox! To prevent warping, keep the temperature above 65°F and reinforce edges with heavy-duty double-sided tape (Gorilla Tape works best).
Yes! But you need to thoroughly clean it first and lay a non-slip mat.
I made this exact mistake—it led to slightly warped edges during summer humidity. But don’t panic! Just warm the warped edges until they soften (you can use a hairdryer), then press the tiles to flatten them.
I never dreamed a $300 weekend project could deliver such a stunning transformation. But peel and stick tiles turned out to be the best budget floor makeover miracle—saving money, preserving my security deposit, and fueling my DIY confidence.
There's no reason why this shouldn't be you if you're struggling with an ugly floor. It's affordable, reversible, and idiot-proof.


