


The Floor Before and After Peel and Stick Tiles: A Real Installation
|
|
Time to read 8 min


|
|
Time to read 8 min
My floor is so old-looking! This is what you said when you entered your room today. The floor looks old and worn out, and the scratches are giving it an outdated look. The scratches can't be removed even by mopping. You're not thinking of renovating, but the floor has crossed the border.
Some of the major factors that homeowners and renters do not choose to have their home or apartment renovated is the cost associated with it, the selection of the right renovation company and the mess the remodel will create. I understand your frustration. What if I say that you can make your old floor a clean, elegant and beautiful one without tearing up everything?
Yes! Yipscazo 18" x 18" Natural Maple Peel and Stick Waterproof Vinyl Floor Tiles can cut down up to 70% of the cost of renovation when compared to traditional renovation. Further, there are no professional or long weekends required.
The video shows how these peel and stick floor tiles can transform your floor into a spectacular floor! This home improvement is a great choice for homeowners, renters, and cost-conscious DIYers. Because this practical.
It's not always terrible the first time you see an old floor. However, scratches, faded colors, and worn patches can make the entire room look dull over the years. In the first scene of the video, the floor appears to be worn out and outdated.
It isn't an integral part of the room design anymore. On the other hand, it resembles a surface that has been used over the years and is in need of a physical facelift.
Appearance is not the issue. Even if the room is beautifully furnished and the walls look great, an old and worn floor will make it less welcoming. Even dirt can become trapped in damaged sections, and some spots with damage to the surface may not be cleaned to perfection with a regular cleaning job.
You may clean the room often, but the floor can still make it look old and poorly maintained. This can be frustrating, particularly when you wish your home to feel fresh and comfortable.
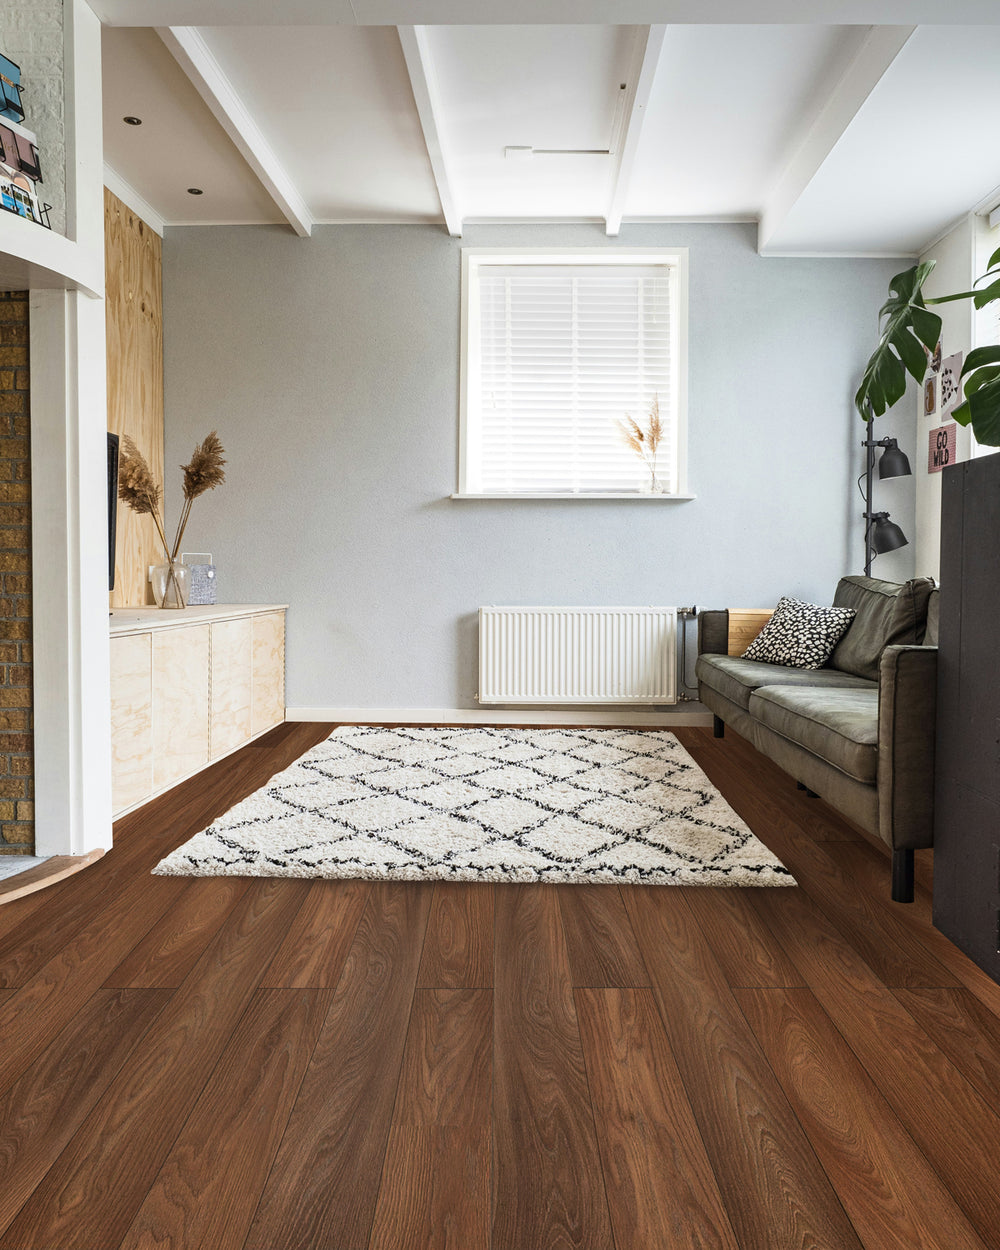
The video shows how changing the floor's surface can make a difference. The final result is warm and natural wood-look, matte maple flooring. It also creates a soothing, natural look in contrast to a shiny surface that reflects a significant amount of light.


The 18×18-inch vinyl tiles make the flooring look tidy and organized, not like a hasty patch. They also create a regular pattern across the floor.
This change reflects the fact that this might be the reason why the old floor might require more than just another cleaning. Sometimes, simply changing its look will refresh the space. One solution to making that change with minimal disruption may be the peel-and-stick vinyl tile.

Peel and stick vinyl floor tile installation is a simple DIY task if the floor is prepared correctly. Here are the steps to follow.
Step 1: Clean the Existing Floor!
Scrub away all dust, dirt, and grease from the floor. The surface should be free of dust and debris and be smooth and dry for the adhesive to adhere.
Step 2: Planning the tile placement
Before installing, take room measurements and make a design plan for the placement of each tile. This will help provide a neat pattern and prevent gaps from becoming uneven on the floor.
Step 3: Peel off the tile Backing
Peel off the adhesive tape. Be careful when handling the tile to avoid exposing it to dust and dirt.
Step 4: Align and Stick the Tile
Position the tile in the correct location and fit it edges to the edges of any other tile(s). Be patient, because it will be hard to reposition after the adhesive is in contact with the floor.

Firmly touch the whole tile with the center, edges, and corners. Good contact will prevent lifting of tiles later.
Measure and cut tiles accurately and precisely around walls and corners with a straightedge and a utility knife. Care must be taken to ensure that edges are clean and waste is minimised.
Inspect installations for holes, upraised corners, or free edges. Before restoring and moving furniture back into place, or wiping down the new floor, read the manufacturer's instructions
An important note for renters: Peel and stick tile can give a floor a quick facelift, but can leave behind some adhesive residue or cause damage to the existing flooring surface when installing and removing the floor tile. Ask a landlord for permission and the instructions for their removal before installing.
The video is a demonstration of the old floor being transformed. Natural maple peel and stick vinyl floor tiles will give the old floor a warm, inviting, and elegant appearance.
The matte finish gives a natural look while not being too shiny. It can also help to camouflage small dust marks and footprints that may be visible on a shiny floor—even though it's still necessary to regularly clean the floor.
It isn't about mimicking real hardwood – it's about creating a product that's as close to real hardwood as possible. You want to have your room look clean and new, but you don't want to be throwing away and replacing the whole floor. These tiles provide an easy solution for homeowners and renters looking to enhance their space.


Peel and stick vinyl tiles can create new tile floors without the hassle of a renovation. Before installation, there are a few things to take into account, however. Knowing these restrictions will allow you to find out whether they fit the needs of your home.
The condition of the floor will have the greatest impact on the adhesion of the tiles: it is most important that the floor be clean, dry, and smooth. Dust and grease, as well as moisture and rough surfaces, may be the reasons that the bond will not form. This may cause the tiles to lift and move with the years. Prior to installation, inspect the floor surface for rough or damaged areas and clean it. Surface preparation can aid in holding the tiles in place
Peel and stick tiles are an ideal option when you wish to renovate your floor without putting too much investment. They might not last as long as conventional hardwood and tile floors, however. It might be wise to opt for traditional flooring options if a long-lasting material solution for the home is desired. These vinyl tiles are just one of the options you should consider if you are looking for a quick and affordable option to improve your floor without having to take the floor off.
The vinyl surface will resist everyday spills; however, water may flood through the joints of the vinyl tiles. When installing them in kitchens, bathrooms, or laundry rooms, it is important to remember this aspect. Make sure that tiles fit correctly and quickly clean up spills. Always follow the manufacturer's instructions when using them in wet places. With proper installation and maintenance, you can have a new, clean, beautiful floor.
Natural maple tiles are 1.5mm thick. These tiles might compromise both the durability and comfort underfoot because they may develop bumps and gaps that thicker tiles don't.
Yes, these tiles are indeed waterproof. You can install them in your bathrooms or laundry rooms. But make sure the room has proper air circulation.
Yes, these tiles can indeed be installed over a subfloor of vinyl or concrete. Be sure the surface is dry, clean, and smooth, however. Prior to installation, make sure that no dust, grease, or loose parts are on the adhesive so that it can adhere for a long period.
These tiles can last longer in a busy household with pets or children if maintained carefully. These are a year-long option. Water-resistant actually means that they can handle everyday splashes but are not scratch-proof.
Yes, natural maple peel and stick vinyl tiles are renter-friendly. You can remove these tiles easily. But they may leave adhesive residue or damage.
An old, worn-out floor does not always require an expensive renovation. Yipscazo's Natural Maple Peel and Stick Waterproof Vinyl Floor Tiles are an excellent solution to reviving your floor space by adding a natural wood floor look. When properly maintained, they are easy to install, simple to clean, and appropriate for everyday spills. But getting a good, clean surface and knowing the pros and cons of tile seams are key to success. If you want an affordable flooring update without major construction, explore Yipscazo's Natural Maple collection. Test a sample in your room before deciding which finish is going to be the right one for your home.


