


Can You Install Wall Panels Over Existing Tiles?
|
|
Lesezeit 8 min
|
|
Lesezeit 8 min
There is a moment when your wall panels in your bathroom or kitchen need to be replaced. Maybe because it looks old or it doesn't match your current personality anymore. But you know one thing: they should be gone ASAP.
However, the second you imagine how the renovation could look: exhausting, dirty, unusable, and expensive if you bring professionals, you'll scratch the idea.
Then, you probably come here because you want a shortcut to replace the look simply by covering the existing tiles with wall panels. Can you really do that?
The short answer is yes.
In most cases, you can install wall panels directly over your existing tiles. This way, you can skip the complicated procedure such as demolition and retiling, entirely.
The longer answer, however, depends on the various factors such as the type of panels, the condition of the original wall, installation techniques, and general planning. Without proper planning and execution, you may want to redo the job every year.
This guide will help you determine whether this procedure is worth trying and prepare the tools and techniques you should have to do the job properly.
Installing wall panels are best for three main reasons:
First, you have physical limitations such as you're renting the space, so you don't have any right to demolish the ugly wall. Second, you have time and energy as an enthusiastic DIYer to cover the old tiles yourself. Third, you have a tight budget but you want a fresh-looking wall.
Covering existing tiles with wall panels really sounds like putting a Band-Aid, and it is. It doesn't solve the main issue you're having permanently. If you care about longevity, and you're going to live there for a long time, it is better to have your wall remodeled properly with new tiles instead. If the problem is the grout line, you can find wider tiles instead to minimize the effect.
Wall paneling can go over tile in bathrooms, kitchens, bars, wall accents, and anywhere else you've got an existing tiled surface. However, not all surfaces are the same.
Here are the basic requirements before you start:
Those bare minimum requirements are non-negotiable. Unfortunately, it is not worth continuing the project if your tiles aren't ready. You'll end up disappointed or spending time, money, and energy redoing the work.
Survey data from UK bathroom fitters show an approximate 78% success rate of installing wall panelling over existing tile. Meanwhile, the rest failed because of a lack of surface preparation.
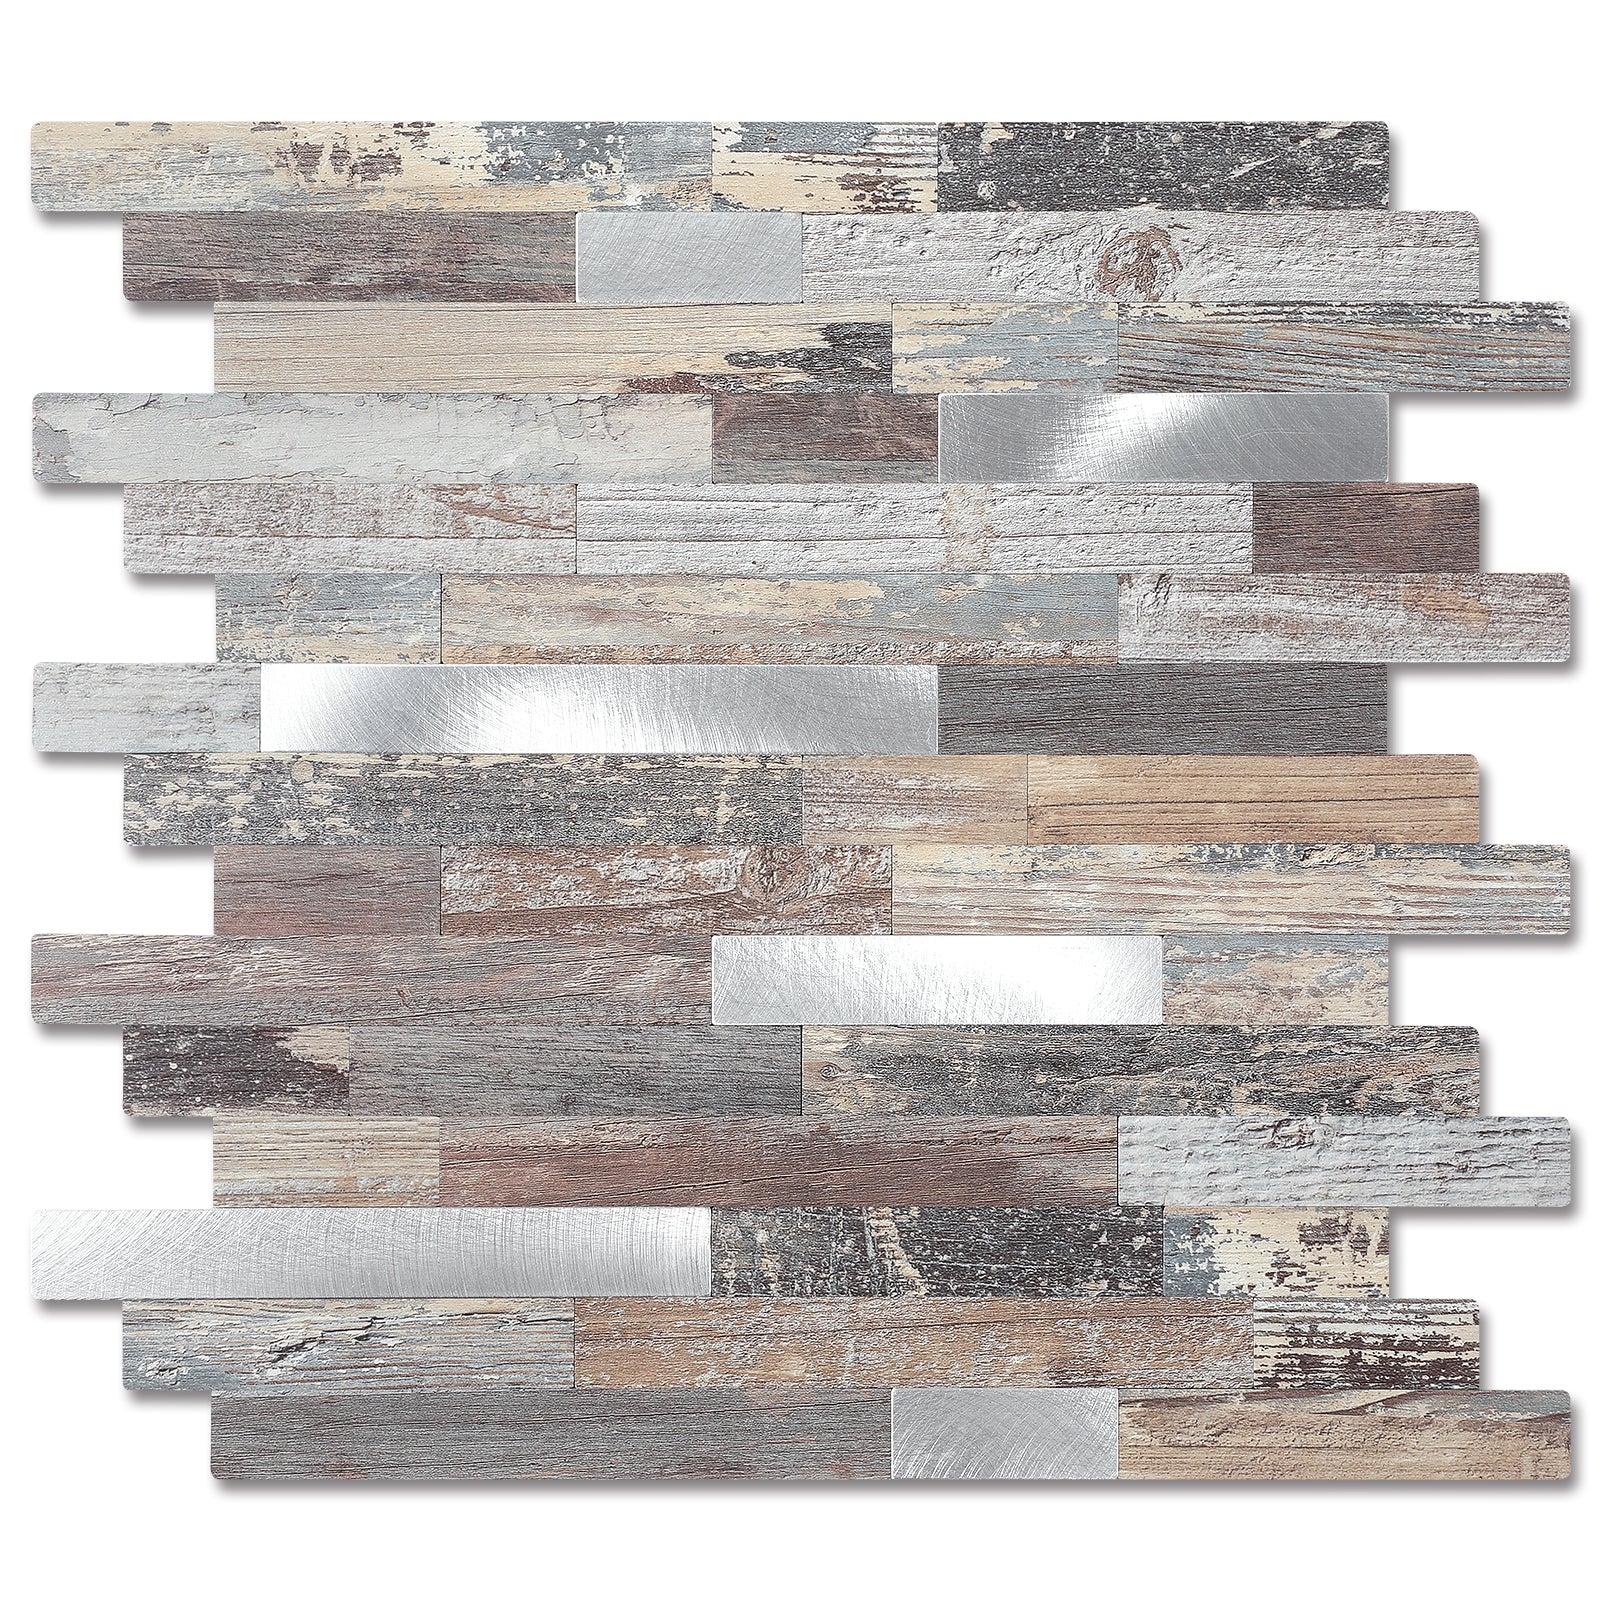
Not all wall panels are equal. Here are the three most common options compared for you to choose from.
PVC panels: They are the default choice for most people for some good reasons. First, they're light, making it easy to handle even by a single person. Obviously, it is also fully waterproof and resistant to mold. That makes them an ideal choice for either bathrooms or kitchens. Its price is also the cheapest among others, making it ideal if you're on a super tight budget.
SPC panels (stone-plastic composite) are newer options. They have a stronger build, and they will retain their shapes. The durability is so superb that people are comparing it with regular tiles. However, it may take more than one person to handle each panel. Some also come tongue and groove with a click-lock mechanism. This is more forgiving for an amateur DIYer. A little tap with a mallet can help connect the panels seamlessly.
WPC panels: Wood-plastic composite is highly recommended for anyone wanting a natural wood look without the real-wood level maintenance. However, it's chosen more for the looks than its performance. As it still contains organic material (the wood), it is not good to be used in wet areas such as the bathroom.
Test your wall and run this checklist:
It is not recommended to move forward with the project if the surface is not ideal. Things like multiple hollow tiles, water infiltration, uneven surface, and peeling tiles require retiling instead of placing over new panels. Otherwise, you're compromising the end result.
You need to pay attention to the panels you buy and its surface. Mostly, you need to scrub the tiles down with sugar soap or a degreaser to remove soap scum and grime as they prevent glue from sticking. After that, let the wall dry completely. If the tiles are glossy, give them a light sand to roughen the surface slightly so the adhesive can grip a lot stronger. Make sure to fix any loose tiles before moving forward.
If you have an uneven surface, in the case of your tiles not covering the whole area you want, you can use wood panels serving as additional surface area.
Measure the wall carefully and note where each panel will sit. It is recommended to try finding panels that fit your wall without cutting them. Don't forget to dry-fit the panels first, without adhesive. That way, you can expect the end result without fully committing to it. The more difficult homework is to decide where trims will go (internal corners, end caps, starter strips)
Apply the recommended adhesive for your wall panels. The manufacturers usually will tell what kinds of adhesive best for your case. Run it in a vertical line across the back of each panel, then put the panel firmly into place. If you want extra strength, you can drill a hole and use a screw to tighten it.
Once everything is positioned properly, seal every single joint, corner, and cut edge with silicone. Don't forget to clean the residues to make the new wall panel professional. Lastly, check everything before considering it done.
Considering how practical and easy it is to install wall panels over existing tiles, you might be wondering its real pros and cons.
Pros: You will get minimal to zero demolition mess. The cost is significantly lower than a full retail, especially if you do it yourself. It also doesn't take a long time to accomplish even for an amateur. Basically, you will get a fully waterproof surface when sealed correctly with no more grout to scrub, and a wide range of styles.
Cons: The project only works if your current bathroom or kitchen tiles are in ideal condition. The added thickness of panels might not be noticeable, but it still reduces the space of the room. There is always a risk of trapped moisture, especially if the project is not done properly. Furthermore, it can also be troublesome if you want to fix the plumbing system behind the wall panelling. Repairing it will take a more significant effort than installing it.
Even so, for renters especially, this is often the most appealing part of the whole approach as it's reversible without damaging anything. It is a low-risk way to customize a place you don't own.
Before committing, always do a dry test first. Then do a half measure by putting a small piece of panel in a similar, but not important spot before committing to the real wall to check if the glue is working as intended.
Always use an adhesive made specifically for panels. Read the manufacturer's instructions instead of trying a random adhesive.
Sealing is extremely important, and so is the product. Find silicone sealing that is durable and suitable for the project you are doing. Make sure to give the adhesive some time to cure before exposing it to water.
If you can afford it, it is also recommended to choose at least 5mm thick panels. They sit flatter and sturdier over uneven existing tiles.
Not advisable. Glossy surfaces need a light sanding to ensure the glue is working properly. You can also screw the panels to ensure its adherence to the wall.
The panels will be separated from the tiles as the adhesive gets weaker. It might get swollen or delaminate. If it is a WPC panel, it can even get moldy.
If installed properly, it can stay solid for 10 months or even more.
Yes, as long as the surface is prepped well and every joint is sealed properly. Make sure you choose either PVC or SPC panels, as they are more water resistant.
It could be. You're adding a layer of wall panels over the existing wall, so any plumbing work behind it must remove the panel first.
Installing a wall panel over existing tile is a common and well-tested renovation shortcut. However, it is worth noting that it works because of careful preparation and execution. It is necessary to check your tiles honestly, choose a panel material suited to your needs, and never rush the sealing step.
If your tiles are solid and flat, there's no real reason to demolish them just to get a new look. Assess your wall, pick your preferred panels, and you can get started.


