


Can You Use Peel and Stick Tiles Behind a Sink or Vanity?
|
|
Lesezeit 5 min
|
|
Lesezeit 5 min
A beautifully updated bathroom vanity paired with a dull builder-grade wall looks incomplete with no spark or charm. The traditional tiles can bring life to the space but the mess and expense can take a heavy toll on the budget for such a small area. Here DIYers and renters ask if peel and stick tiles can be used behind a sink or vanity. So yes, this is one of the most practical and rewarding applications for peel and stick tiles. This low-splash zone looks stylish but doesn't face the extreme moisture of a shower interior.
Let's get into its details. This guide will walk you through everything you need to know, including a detailed list of compatible Yipscazo products, design inspiration, a foolproof installation process, and much more.
First, do a comprehensive project site analysis because the location matters a lot.
Vanity backsplash is a small area (~4-6" high or up to mirror height) with mild soap splashes, toothpaste and hand-washing spatter. While kitchen backsplash is a larger area with more risk of stubborn grease stains, oil splashes and high temperatures.
Thus, peel and stick tiles prove ideal for vanity areas for their easy application and minimal upkeep. They require no extensive setup and are DIY-friendly, giving a high-end interior outlook. In fact, renters can do a quick revamp without violating a lease.
Sink and vanity areas are constantly exposed to moisture requiring water-resistant tiles. Products like Retro Copper Herringbone Tile feature a plastic surface coating for moisture protection and durability. Similarly, a light gray 3D vinyl backsplash is another versatile option.
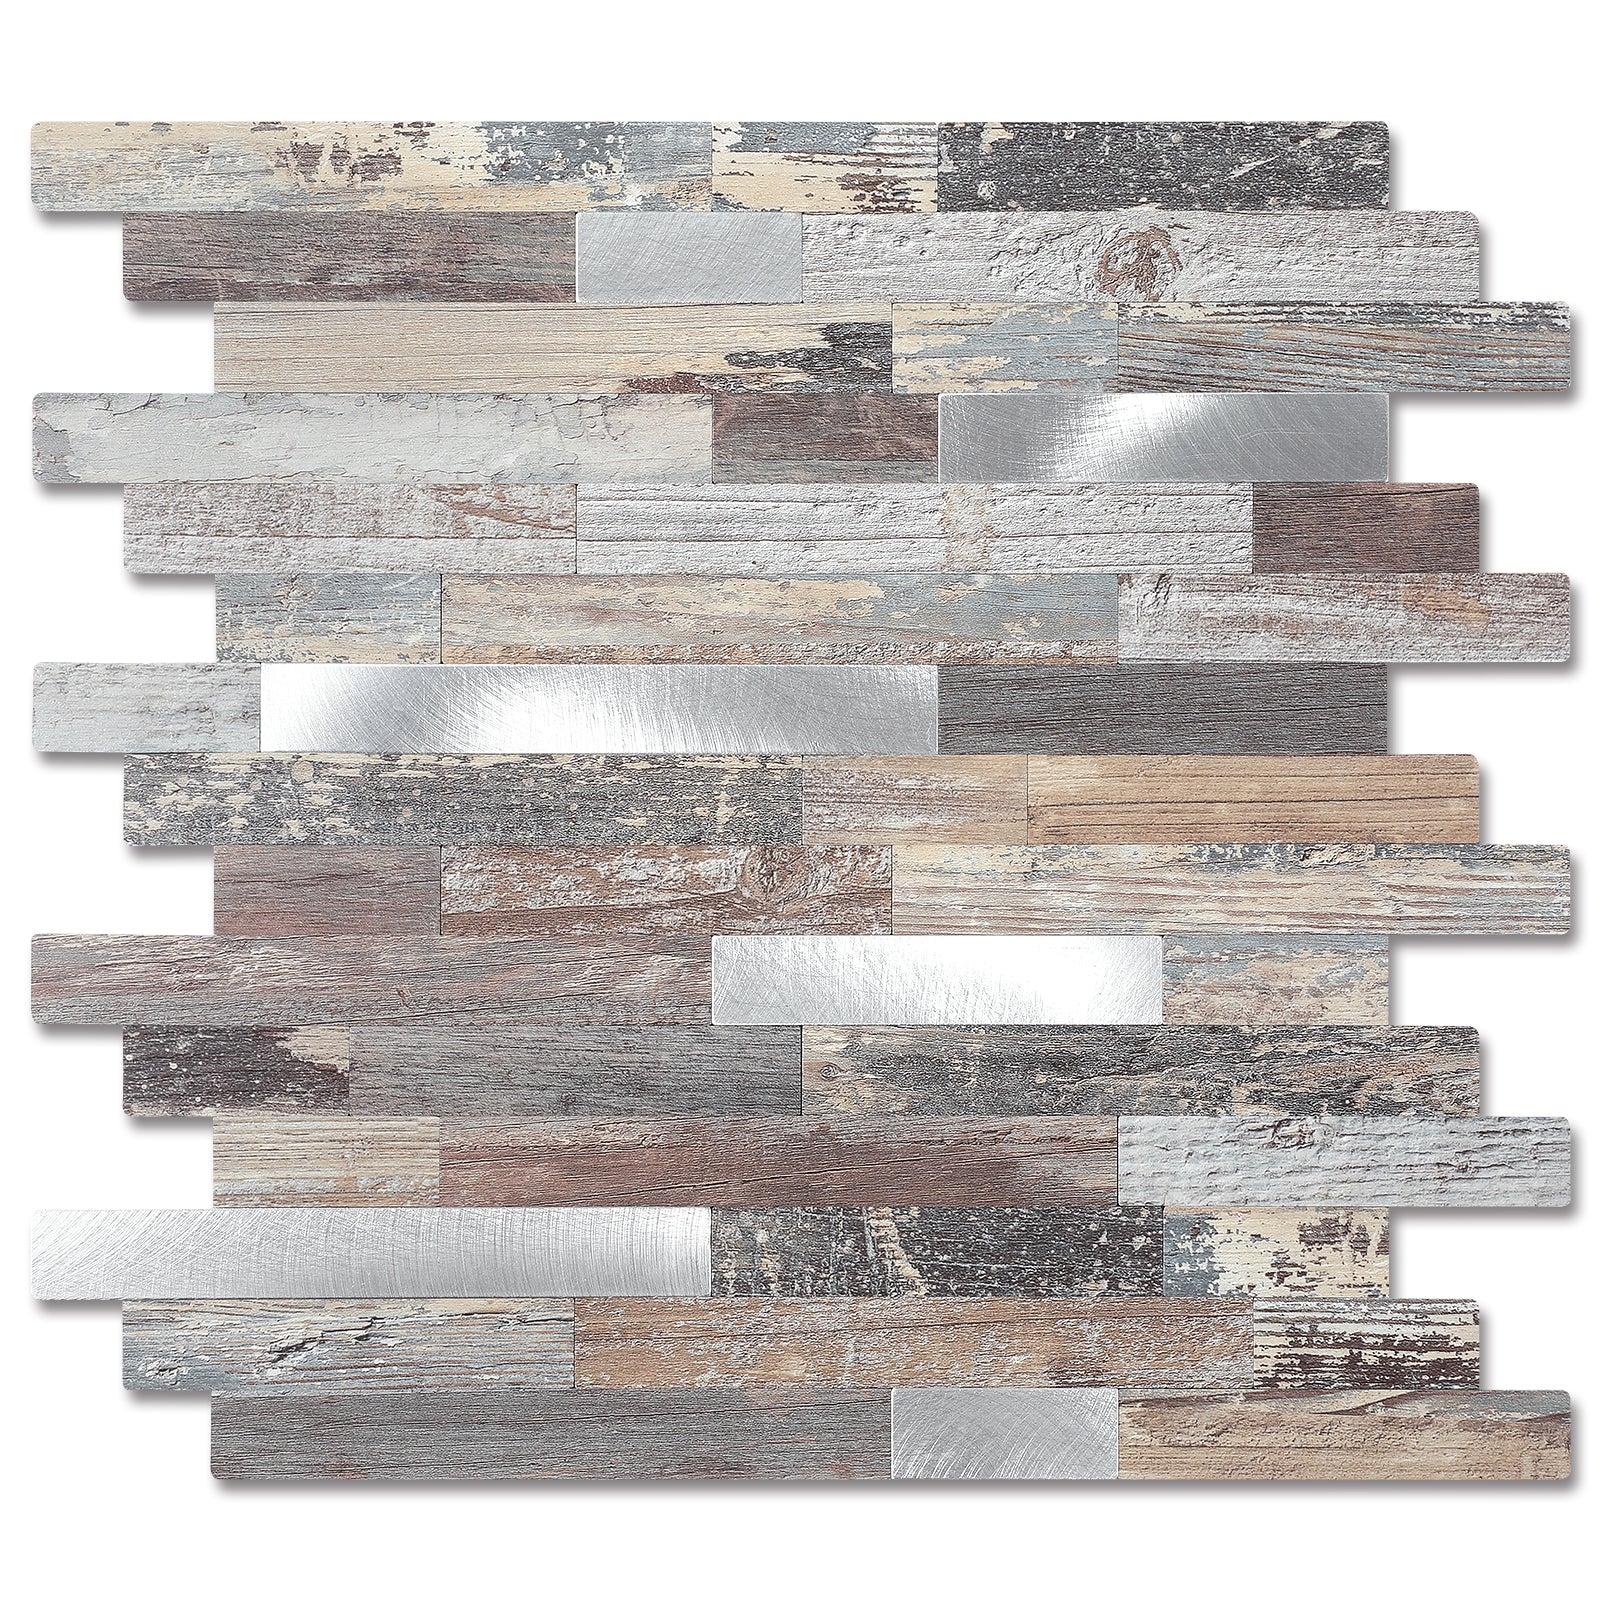
Extensively used washbasins or vanities need extra protection in terms of thick and durable tiles. Premium options like Yipscazo Stone and Metal Tile have a thickness of 4.3mm, making them heat and water-resistant - perfect for use around daily use washbasins.
These tiles also have a strong adhesive backing - most Yipscazo tiles use a strong 3M foam backing tape for easy DIY application. But the secret to successful application lies in the surface preparation (smooth, clean and deglossed surface).
Transform your vanity backsplash using these real-life ideas:
Make a calm and minimalistic vanity using glossy, light-toned 3x12 white subway vinyl tiles. The uniformity of the tiles creates a visually sound space that makes every morning bright with its light-reflecting tiles near the mirror. The clean and crisp background also radiates positive energy to the entire bathroom.
Now think beyond the traditional to make something stunning. Extend peel and stick tiles around the mirror frame and along the adjacent wall. This not only creates visual interest but also helps build a feature zone in a budget-friendly way.
Another great way is to give full tile coverage. Apply tiles from the countertop up to the bottom of the wall cabinet. It maximizes the protective barrier and creates a more cohesive look.
Get a bold yet modern backsplash with these artistic Retro Copper Herringbone Tiles. The water-proof and heat-resistant properties of the tiles makes them suitable for sinks near the stove. They are built thicker and stronger with 3M foam backing to firmly stick on the smooth wall surface.
This light gray subway backsplash comes with a 3D embossed finish to create a textured wall look. Its light and flexible design makes it easy to cut with a utility knife, making it an excellent choice for DIY projects. This subway tile can even stick on the textured wall surface.
Stone and Metal Hexagon Tile is a real tile - not a wallpaper or a 3D gel sticker. Its 4.3mm thickness makes it an ideal choice for extensively used washbasins. You can cut the tiles with a utility knife or use a pair of heavy-duty scissors.
Follow these steps to install peel and stick tiles like a pro:
No, it is not necessary to remove your old vanity countertop and sink before installing peel and stick backsplash. Just ensure the wall is dry, smooth, clean and dust-free with no soap or paint residues.
Sanding is the best option to prepare light textured walls for peel and stick tiles. For heavier texture, install a smooth backer surface or go for a thin skim coat so the adhesive can bond evenly.
Peel and stick tiles can be used behind a vessel sink that has a higher splash zone. Remember, tiles must be water-resistant, waterproof and tightly secured with no gaps left behind in the wall.
An accidentally created small gap between the edge of a tile and the mirror can be fixed with a thin bead of color-matched or clear silicone caulk. Smooth it with a caulk tool or a damp finger for a neat finish.
Using peel and stick tile behind a sink or vanity is an excellent and practical way to achieve interior design goals with DIY projects. All it needs is the careful wall prep and right selection of the tiles for an aesthetic vibe. So, think smart and change your daily mood with Yipscazo's peel and stick tiles collection including Retro Copper, Light Gray 3D Vinyl, and Stone & Metal tiles having endless style possibilities.


