


The Complete Guide: Cutting, Lining Up & Sticking Subway Tile Backsplash – No Grout, No Mess
|
|
Lesezeit 7 min
|
|
Lesezeit 7 min
Transform your kitchen into a timeless retreat with our warm beige stone-textured peel and stick subway tile backsplash. Crafted from durable PVC, these tiles mimic the look of matte stone without the heavy grout lines or messy installation. The subtle stone pattern adds depth, while the warm beige hue creates a cozy, inviting atmosphere perfect for any wall surface. Cutting is effortless with standard scissors, allowing you to fit these tiles around outlets and corners seamlessly. Lining them up is simple thanks to the precise grid backing, ensuring every piece aligns perfectly for a professional finish. Sticking them down requires no adhesive; just peel the protective layer and press firmly onto your clean, dry wall. This no-grout solution offers a sleek, modern look that resists moisture and stains, making it ideal for busy kitchens and bathrooms where style meets practicality.
These warm beige stone-veined peel and stick subway tiles are crafted from durable PVC, offering a realistic marble-like texture with subtle natural striations and earthy tonal variations. The matte stone finish mimics genuine travertine, providing a soft, non-glare surface ideal for kitchen backsplashes and bathroom walls. Each tile features a classic subway shape arranged in a staggered brick layout, creating a clean, timeless mosaic pattern that enhances visual depth and continuity. The color palette includes creamy beiges, soft taupes, and gentle ivory undertones, which blend seamlessly to produce a warm, inviting ambiance. When installed, the tonal shifts and fine veining create a cohesive, organic look that adds elegance without overwhelming the space. The flexible PVC material ensures easy cutting with a utility knife, precise alignment along edges, and secure adherence without grout or messy adhesives. Perfect for transforming kitchen backsplashes and bathroom walls, the tiles' stone-inspired design delivers a refined, modern aesthetic while simplifying installation. The overall effect is a sophisticated, low-maintenance surface that complements neutral palettes and enhances natural light in high-traffic zones.
The subway tile backsplash is a design staple that brings remarkable versatility to any space. Here are three exciting ways to unleash the full potential of this captivating collection!
This kitchen scene showcases a sleek, modern backsplash featuring peel and stick subway tiles in a soft, stone-like beige finish. Drop ceiling tiles neatly arranged in a classic horizontal layout, creating a clean, textured look that complements the warm wood cabinetry and countertop. The transformation is seamless—achievable with just three simple steps: cutting tiles to fit around fixtures, lining them up for perfect alignment, and firmly sticking each piece in place. The result is a professional-grade upgrade without the mess or tools of traditional tiling. Natural light from the window enhances the subtle variation in tile tones, adding depth and warmth to the space. This effortless application makes it ideal for DIY enthusiasts seeking a stylish, low-commitment kitchen refresh.
The bathroom features a sleek, modern design with peel and stick subway tiles applied to the wall behind the floating vanity, creating a clean, cohesive look. The tiles, in a soft beige tone with subtle gray veining, mimic natural stone and add texture and elegance. The process was simple: first, tiles were easily cut to fit around the mirror and outlet; second, they were carefully lined up for seamless alignment; third, each piece was firmly pressed into place. The result is a professional finish without grouting or tools. Natural light from the window enhances the tiles' depth, while the minimalist sink and wooden vanity complement the updated backsplash. This DIY-friendly solution transforms the space effortlessly and durably.
The laundry room is transformed with peel and stick subway tiles, creating a clean, modern backsplash behind the washer and dryer. The beige subway tiles enhance the space's brightness and sophistication. The installation process is simple: first, precise cutting ensures perfect fits around fixtures; then, careful lining up guarantees straight, seamless rows; finally, each tile is firmly pressed into place, adhering instantly without mess. The result is a durable, water-resistant wall treatment that resists stains and moisture—ideal for high-traffic laundry areas. The neutral tone complements the wooden shelving and woven baskets, adding warmth and cohesion. This easy DIY upgrade elevates functionality and style with minimal effort, proving that beautiful, professional-looking walls are achievable in just three steps: cut, line up, stick.
One of the main advantages of a subway tile backsplash is that it simplifies the tile installation process. There's no need for mortar, grout, or sealing. However, it's still important to prepare properly in order to achieve a finish that looks professionally done. Follow this detailed guide for a professional‑looking finish.
If you love the subway format but desire a different mood for your space, the same interlocking tile pattern is available in alternative colorways, each one with its own distinct personality.

This peel and stick subway tile showcases a sleek black marble texture with striking white veining, creating a luxurious and high-contrast appearance. The tiles measure 3x6 inches and are arranged in a classic horizontal layout, enhancing the depth and elegance of kitchen backsplashes. The bold color scheme adds drama and sophistication. Installation is straightforward: simply cut, align, and stick to achieve a professional finish in just minutes.

This peel and stick subway tile backsplash has a smooth, glossy finish that resembles ceramic and features a subtle linear texture, reminiscent of classic subway tiles. The uniform white rectangular tiles are arranged in a traditional offset grid, creating a clean and timeless appearance. The monochromatic white color scheme enhances brightness and creates a sense of spaciousness, making it ideal for living rooms. Installation is straightforward: simply cut, align, and stick—no tools or mess required.

This peel and stick subway tile features a glossy, marbled green texture with subtle variations in hue, creating a dynamic, nature-inspired backsplash. The horizontal layout enhances visual flow, while the mix of deep emerald and mossy tones adds depth and vibrancy. It's easy to install—just cut, align, and stick—for a seamless, modern update to your bathroom.
No — that's the beauty of peel and stick tiles. For most cuts, a sharp utility knife or heavy‑duty scissors works perfectly. Score the front of the tile along your cut line, then snap it over a straight edge. For curves around outlets, trace the shape onto the backing paper, then cut carefully with scissors. Unlike ceramic tile, there's no wet saw, no tile nippers, and no dust.
The key is preparation. First, use a bubble level to draw a faint horizontal line where your first row will sit. For the classic 50% offset subway pattern, create small vertical reference marks every few inches. Then, dry‑lay the first few tiles without peeling the backing to confirm alignment. Start at the center of your backsplash and work outward. Many subway peel and stick tiles also feature spacer tabs built into the edges — they automatically maintain even gaps for a realistic grout‑look without any measuring.
Follow the "peel and press in stages" method. Peel back only 2–3 inches of the liner, align the top edge along your level line, and press that small section down. Then slowly pull the rest of the liner while smoothing the tile from the center outward using a credit card, squeegee, or roller. If a bubble appears, lift the tile back to that spot and re‑press. For large bubbles, prick with a pin and smooth out. Work row by row, and use a level every few tiles to catch mistakes early.
That's the most common mistake. If the wall has grease, dust, or glossy paint, the adhesive may fail within weeks. Always clean with a degreaser, lightly sand shiny surfaces, and ensure the wall is dry before starting. If you accidentally stick a tile onto a bad surface, gently peel it off (use a hairdryer to warm the adhesive), clean the spot, and reapply a new tile — or clean the back of the same tile if the adhesive remains tacky.
Absolutely — that's one of the biggest advantages. Because there's no mortar or grout, the tiles can be removed cleanly. When it's time to move out, warm the tiles with a hairdryer on low heat, then slowly peel from a bottom corner. Any leftover adhesive residue can be wiped away with rubbing alcohol or a citrus‑based remover. Your landlord's original wall stays undamaged, and you get your deposit back.
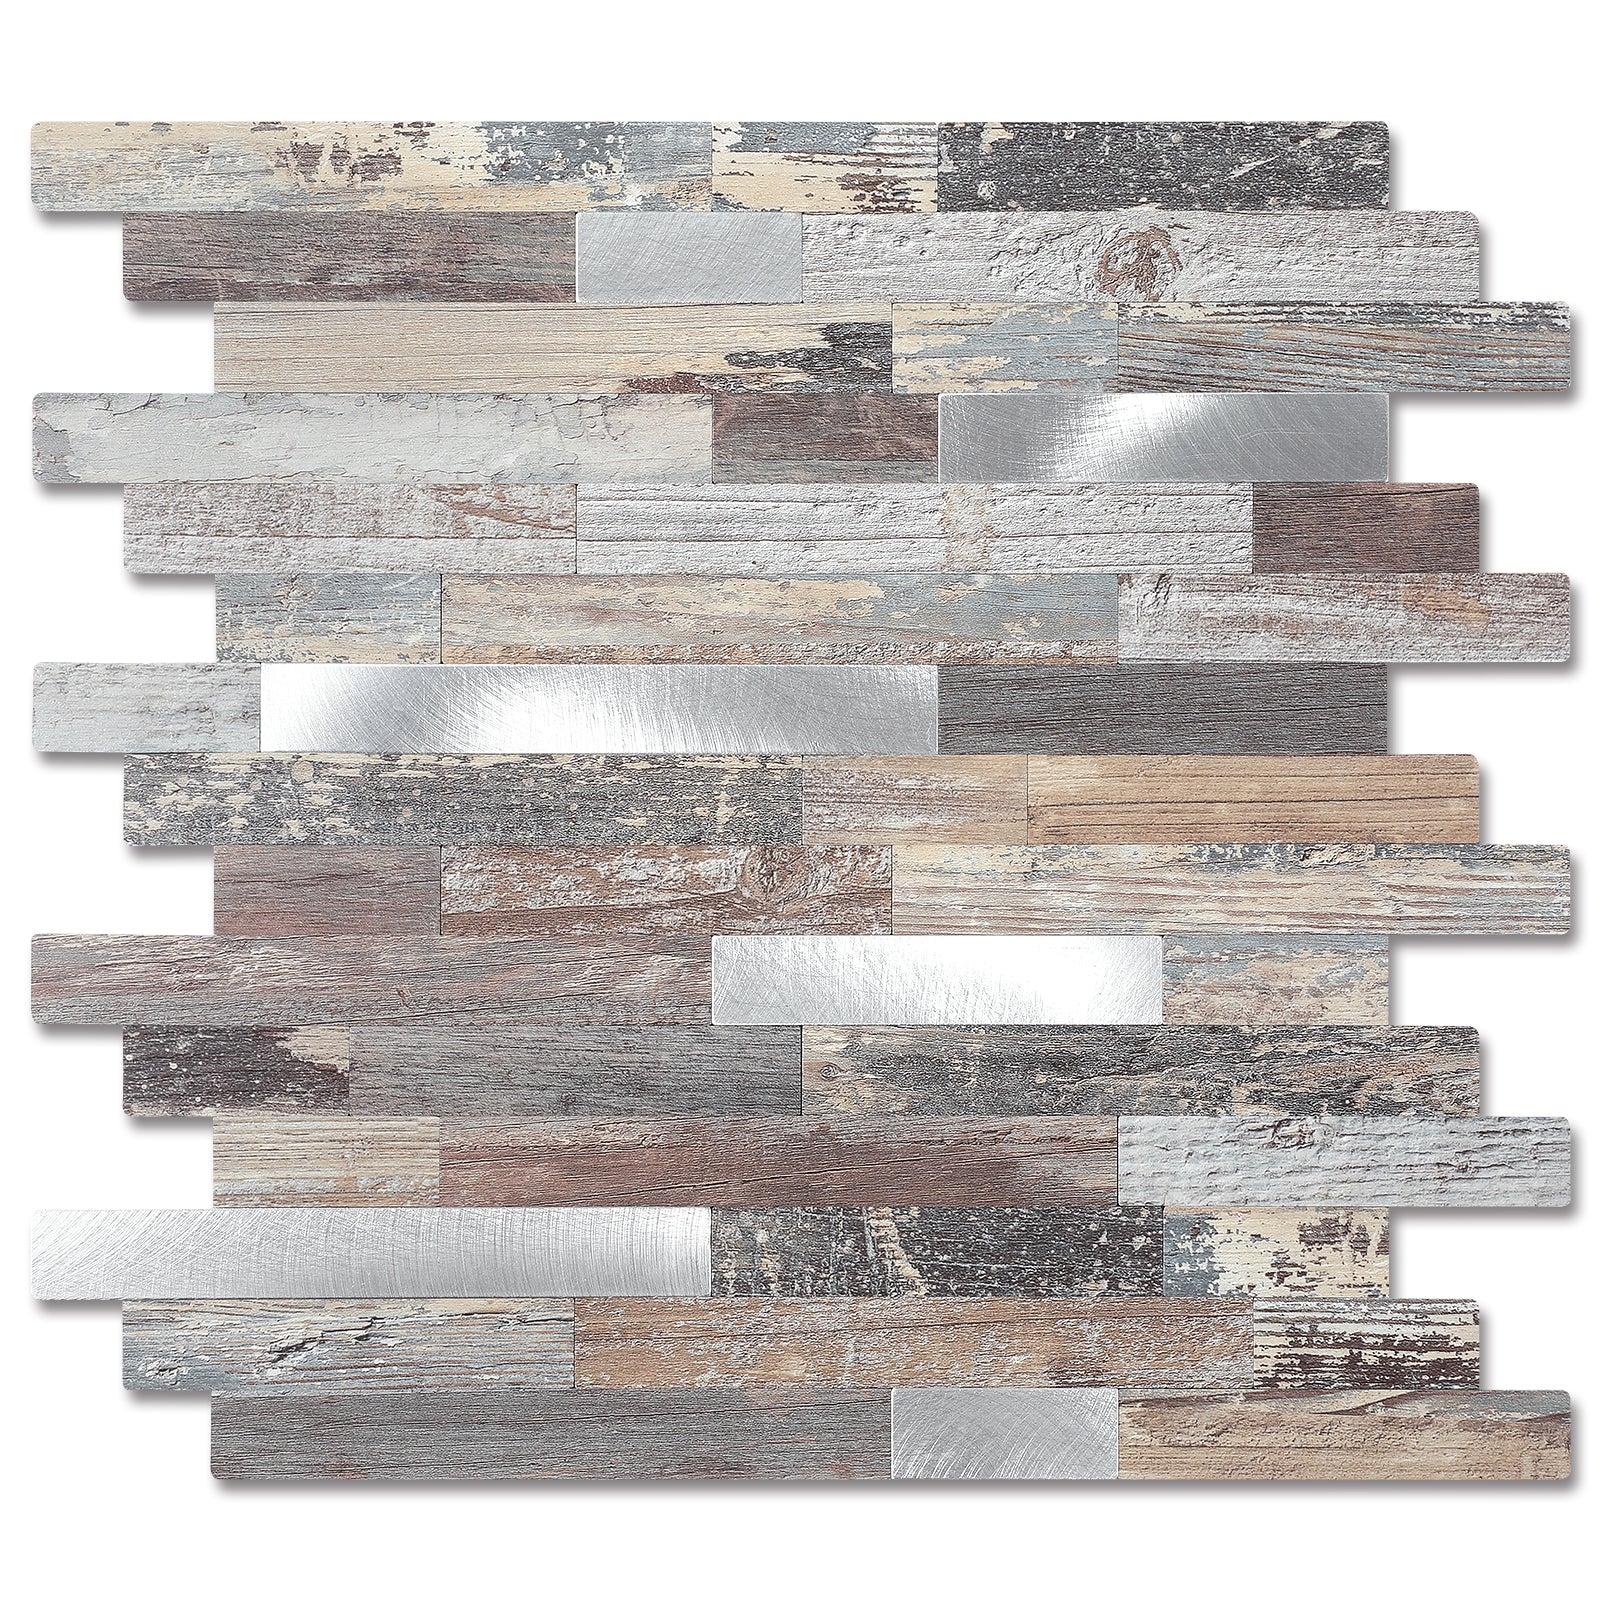
Transform your kitchen with our matte stone subway tile backsplash, featuring realistic brushed metal accents for a modern look. Simply cut the flexible sheets to size, line up the precise edges, and stick them firmly to clean walls without grout or mess. Our durable peel and stick tiles come in classic white, warm beige, and sleek charcoal, offering textured surfaces that mimic real stone or metal. Perfect for laundry rooms, bathroom walls, or fireplace surrounds, these easy-to-install sheets create a seamless finish instantly. By mastering the simple trio of cutting, lining up, and sticking, you achieve a professional-grade subway tile backsplash in hours. This guide proves that achieving a stunning, no-grout wall transformation is effortless when using our premium textured materials, fulfilling the promise of a clean, stylish upgrade without the traditional hassle.


