


No-Paint Wall Fix: Creative Peel and stick Tile Patterns for Easy
|
|
Lesezeit 6 min
|
|
Lesezeit 6 min
Damaged walls are a nightmare to homeowners and renters alike. While repairs can take days to complete, they require expensive tools and can be messy.
Hence, homeowners constantly seek fast, cost-effective solutions to restore their walls. This is where peel and stick tiles come in.
Whether you are a homeowner looking for a creative way to repair your walls or a renter facing "no painting" restrictions, peel and stick tiles are the right solution for your damaged walls. Peel and stick tiles are effective in applications where covering cracks, hiding stains, and refreshing the atmosphere of a space are necessary without applying paint.
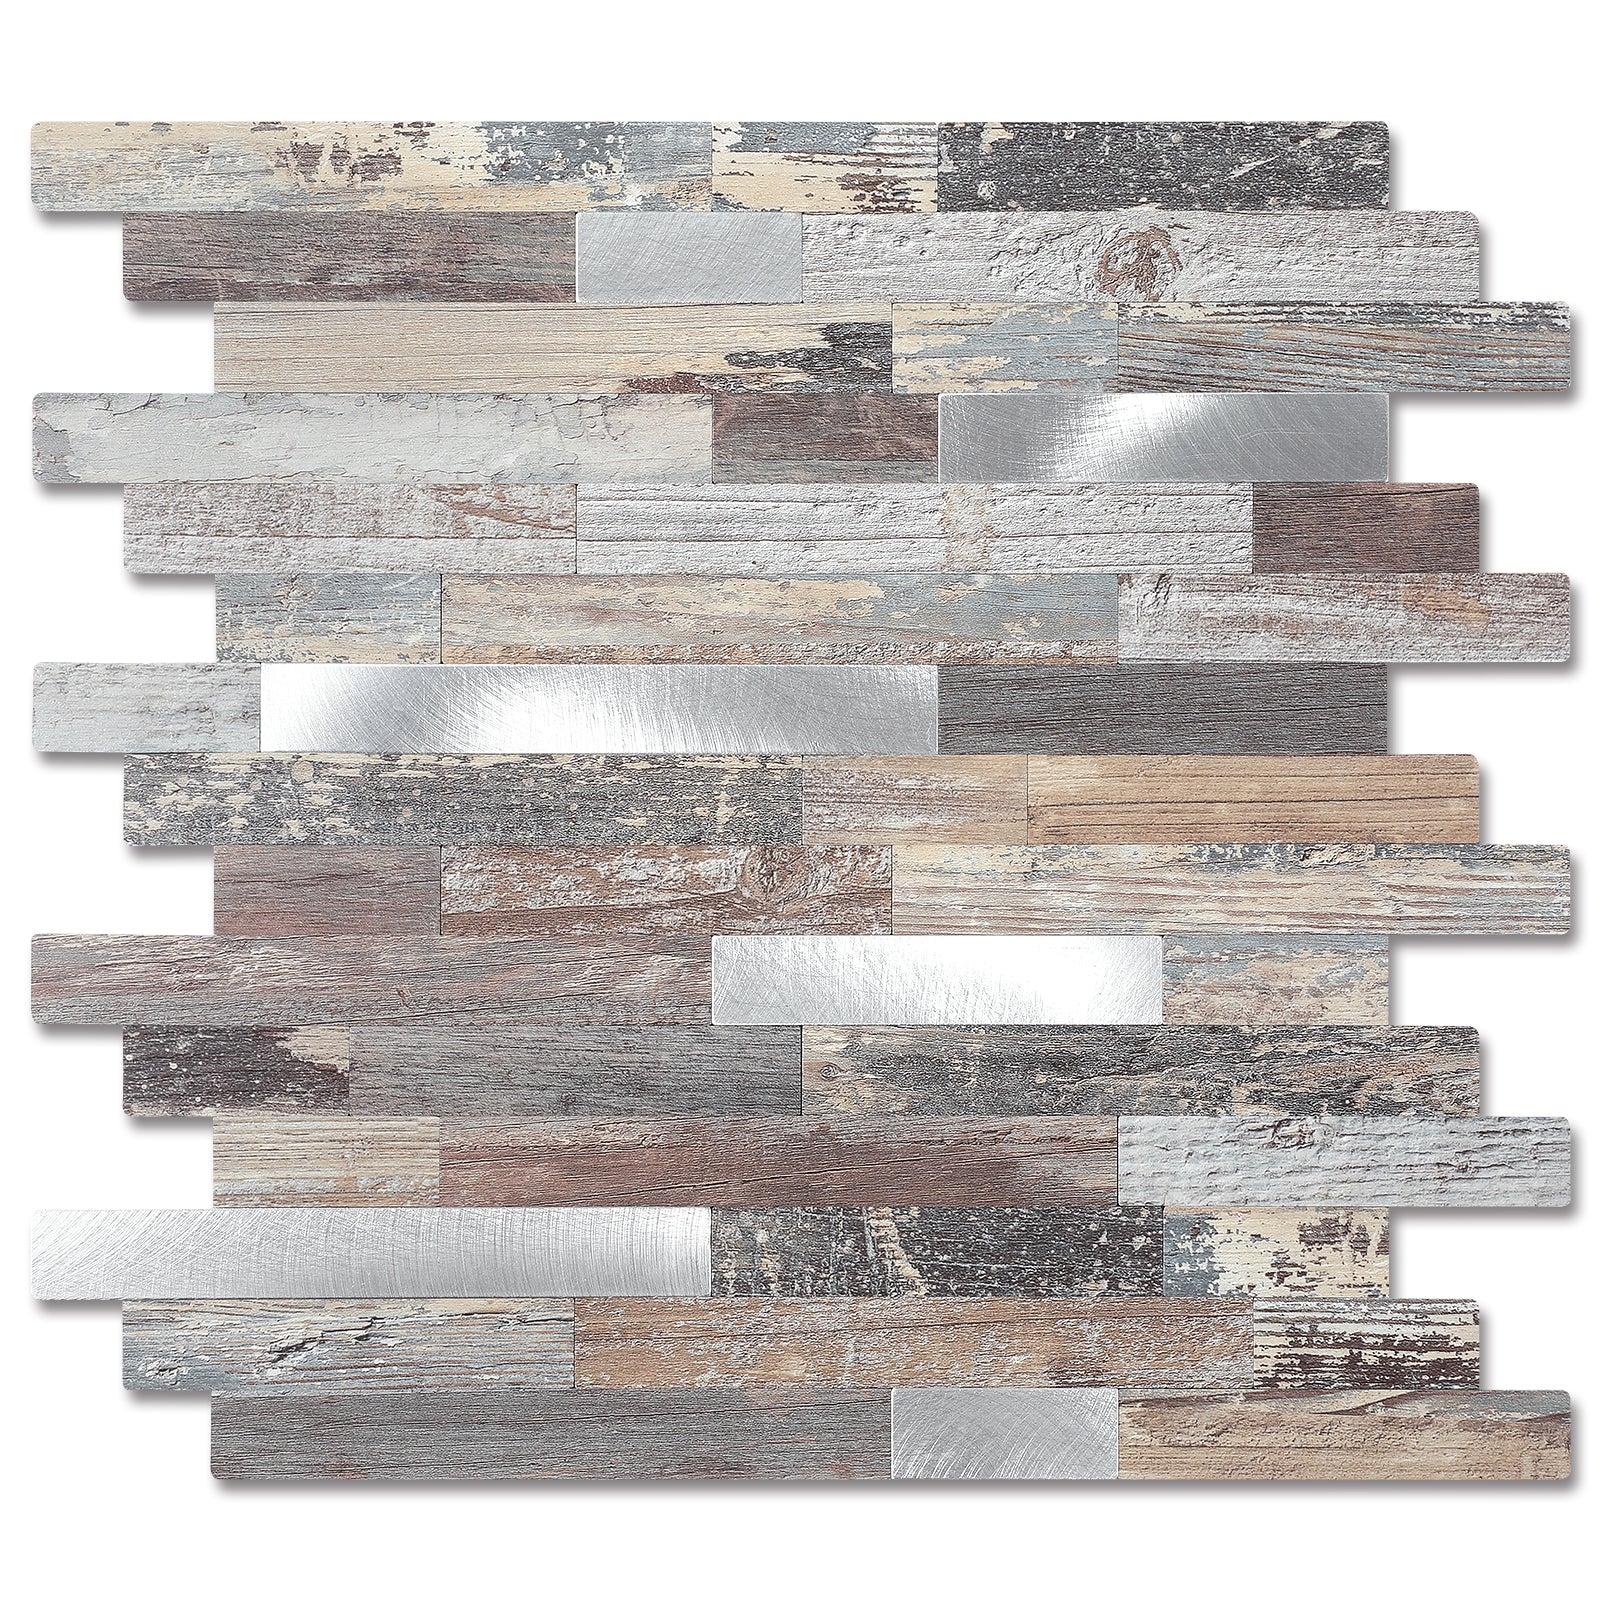
With more than 20 patterns, you can easily find the right option that meets your design and taste and revamp your walls in only two hours. Interestingly, each pattern offers waterproof and stain-resistant properties and leaves no residue after removal.
Available in a variety of patterns, peel and stick backsplashes are designed to hide wall imperfections and improve the overall look of the walls. These tiles also help communicate your personality through your space.
Here are five peel and stick tiles to enhance the look and integrity of your walls:
Herringbone tiles, characterized by the V-shape joints, are an excellent option for treating cracks around door frames or marks from appliance removal. The pattern's visually appealing lines help cover imperfections on the walls while giving them a polished look.
A common example of herringbone tiles is wood grain gold herringbone tiles, a great idea for fireplace surroundings. Whether used in the living room or entryways, expect herringbone to add texture and sophistication to your space.
Hexagon tiles are not only trendy but also functional. Thanks to their interlocking joints, hexagonal peel and stick tiles distribute stress evenly and cover wall cracks perfectly.
Since the tiles are made from SPC (stone-plastic composite), a durable tile material, they are impact-resistant and long-lasting.
When used in the kitchen, consider off-white stone-textured hexagons paired with metallic accents behind the stove. While this combination aims at hiding grease stains and minor wall damage, it adds elegance to the space.
Looking for an option of peel and stick tiles to conceal uneven surfaces in your space? You will never go wrong with long subway tiles. Due to their versatility, long subway tiles are excellent at masking scratches and dents on walls.
Although they are versatile, long subway tiles are commonly found in kitchens and bathrooms where durability is a consideration.
Made from SPC, long subway tiles don't bend easily and will give your surface the smooth, professional finish it deserves.
Lantern-pattern tiles stand out from the list by giving an artistic touch to damaged walls. This feature makes them the ideal choice for playrooms and creative spaces.
With a combination of metallic and copper finishes, these tiles give a handcrafted look that goes beyond hiding damage.
Lantern tiles are ideal for covering children's graffiti or dirty walls and turning imperfections into elegance.
Homeowners and renters who cherish minimalist designs find value in a linear blend tile backsplash. Suitable for complementing any décor, these tiles are ideal for refreshing dirty or damaged kitchen walls without painting.
With a sleek, uncluttered appearance, linear blend tiles not only hide dirt but also transform high-traffic areas into spaces to behold.
One significant beauty of peel and stick tiles is their ease of installation. Installing peel and stick requires no special tools or professional skills.
With these three simple steps, anyone can equip their space with a flawless finish:
Unlike painting, treating your wall for peel and stick tile installation requires no heavy tools. You only want to remove impurities that might react with the adhesive.
Start by cleaning the wall with alcohol wipes to remove dirt, such as grease on kitchen walls, or soapy water to remove fingerprints. While you may skip small holes less than 5mm, fill larger holes (above 5mm) with self-adhesive before moving to the next step.
The final look of your installation depends on your layout, so you want to do this with utmost care and avoid flaws. This is where you need the flaw-avoidance method.
The flaw-avoidance method involves dry-laying the tiles by centering herringbone tiles on the crack or aligning hexagonal tiles along the crack line.
Mark alignment lines with a pencil and create X shapes on the tiles that need cutting to accommodate obstacles like electrical sockets with a utility knife. Without using any cutting tool, fold the tile inward to achieve a clean fit.
Now that your surface and tiles are ready for installation, peel off half of the tile adhesive backing, align the tile to the wall, and press it firmly onto the wall as you peel the other half. Smooth out air bubbles using a squeegee or a credit card as an alternative.
In installations involving high-moisture areas like bathrooms or kitchens, you want to seal the edges with silicon adhesive or transparent nano-tape for enhanced durability. This prevents moisture from sipping in through the edges, reducing the risk of warping.
Your task of treating crack walls with peel and stick wall tiles doesn't end at the installation. It is equally important to maintain peel and stick tiles to always keep them in excellent condition.
Here are a few key tips:
Regularly cleaning your tiles helps remove stains and keep your tiles looking good. Use a 1:4 mixture of white vinegar and water, and avoid strong acids as they are linked to weakening tile adhesives over time.
Another tip for maintaining your peel and stick tiles is to replace damaged tiles. Using a hair dryer, heat the affected tiles to loosen the adhesive. With this, you can easily remove your old tiles and replace them with new tiles.
Ordering 5% extra when stocking your tiles helps ensure color consistency during replacements.
After some time, consider upgrading your tiles with new patterns. Upgrading your peel and stick wall tiles is essential to refreshing your space without starting from scratch.
For example, consider installing metallic stripes over a grid pattern for a 3D textured effect.
You can cover any size of holes with peel and stick tiles. While you can install your tiles directly on small holes below 5mm, larger holes above 5mm require filling with self-adhesive before applying tiles.
Yes, peel and stick tiles are suitable for a damp bathroom. Options like hexagonal tiles made from SPC have mildew-resistant properties and epoxy caulking, which are ideal for humid environments.
No, removing peel and stick wall tiles doesn't damage the wall's property or leave residue, which makes them renter-friendly. Hence, you can retain your wall' latex painting after removing your tiles.
Peel and stick tiles are the quick, stress-free solution for damaged walls. Whether you're covering cracks, hiding stains, or refreshing a room, peel and stick tiles offer a wide range of designs and require no special tools or professional skills.
From herringbone to hexagonal patterns, creating a custom look that communicates your taste and style through your space is made easy.
Are you looking for where to shop for your peel and still tiles? Yipscazo Tile has got you covered.
Related readings
Elevate your space
Ready to transform your home with peel and stick tiles? Explore Yipscazo's curated collection of timeless essentials.
Bring the cozy cottage charm into your house today!
Verwandtes Produkt
12" X 12" Rustic Peel and Stick Diamonds Tile Kitchen Backsplash
€41,95


